Showing posts with label Mountaineering. Show all posts

How I Prepared to Climb a Big Mountain without a Big Mountain

I had a great time writing this as a guest post for Camp The Summit, but didn't want anyone to miss it! Here it is, and the guest post link is here.
 
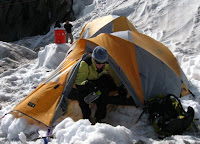
Heading up to Camp Muir and later, the summit of Mt. Rainier!
“Omigod. Omigod. Omigod.”  Looking out the car window en route to Ashford, Washington, that’s all I could say. Beautiful snow covered Mount Rainier loomed in the distance. “Omigod. I’m going to climb that?”Some will argue Rainier isn’t a big mountain. There are 53 peaks in Colorado over 14,000’ and Rainier stands at 14,411’.  True it isn’t Everest big, but it is the most glaciated peak in the contiguous United States. Serious mountaineers come to Rainier for training. Depending on the route, you’ll gain upwards of 10,000 vertical feet and spend a good bit of time at altitude. To me, that makes Rainier a big mountain.

In January of 2010, I signed up to climb Rainier as part of the Big City Mountaineers Summit for Someone Climb Series. As part of an all-women’s team, I scaled the mountain with RMI Guides on a four day program in August. It’s the first climb of its kind I’d done and had no idea how to start preparing. Ideally, my training regimen would involve a lot of hiking and elevation gain, but I live in Southeastern Pennsylvania. I didn’t have easily accessible mountains to train on. But through research, help from friends and a lot of trial and error, I was able to prepare well enough to have a successful climb. Here are my five best tips for getting ready for Rainier or a similar peak without big mountains!

On Algonquin in the Adirondacks with EMS Climbing School!
1. Learn Some Stuff
I was a mountaineering n00b when I signed up for Rainier.  Even if you’re climbing with a guide, it’s important to have at least basic levels of knowledge. Reading books like Freedom of the Hills can help, but there’s no substitute for hands-on training. I took a three day introduction to mountaineering course with Eastern Mountain Sports in Lake Placid several months before the climb, and it helped me feel more confident about staying safe on Rainier. There are guiding companies across the country, including the renowned American Alpine Institute, that offer classes to help get you started. And if you’re doing a guided climb, sign up for one that has a training component, like RMI’s four day Rainier program.

2. Consult Experts, Including Experienced Friends, and Formulate a Training Plan
I knew how to train for some specific activities, but climbing a big mountain wasn’t one of them. Thanks to the twitter community I’ve found myself in, I was able to compile a list of training tips from friends who understand what it takes to climb Rainier. I owe them a lot! 

The actual day-to-day training plan I used came from a DVD called, fittingly enough, “Train to Climb Mt. Rainier.” The DVD was produced by Courtenay and Doug Schurman of Body Results, and is a targeted training tool for novice and intermediate mountaineers. Courtenay actually wrote the mountaineering conditioning chapter in the seventh edition of Freedom of the Hills! On the DVD, you’ll learn about aerobic and anaerobic training, flexibility, strength, and best of all, you’ll get access to their 6-month training plan. There are many different plans out there (from IMG), but this one is very specific, and it works. Find one that works for you and commit to it, no matter what.

My last training hike! On Mt. Minsi. (P. Gensel)
3. Make Sport-Specific Training a Priority
The piece of training advice I heard most frequently was to train with a heavy pack as much as possible. When you’re climbing a big mountain, you’ll spend most of your waking hours with weight strapped to your back and your body needs time to adapt to what that feels like. I heard stories of marathoners stopping short of summits because, despite their cardiovascular conditioning, their bodies weren’t prepared for the long uphill weighted battle.

My training plan called for a gradual increase in elevation gain and hiking time over the course of six months. In the beginning, I’d hit one of my favorite local hiking spots with 20 pounds on my back and hike for two or three hours. By the end of the plan, I was supposed to gain 4,000-5,000’ of elevation over eight hours with 40 pounds or more at least once or twice a week, coupled with interval training. I’d do some of my favorite local hikes, like Glen Onoko Falls, multiple times in one day. If I couldn’t make it outside, I’d hit the Stairmaster or treadmill and try to gain the same elevation. It’s exhausting and time consuming, but it pays off. So, get a heavy pack on and start hiking!

4. Train Your Brain
"Mountaineering /n./ slow walking uphill while not feeling very well." 

Mentally pushing through the physical suffering and fear that makes mountaineering what it is can be the difference between summiting and not. On summit day, we climbed up Rainier for 16 hours on less than four hours of sleep. I was exhausted, my muscles were screaming, and I had an altitude-induced migraine. I spent a good bit of summit day absolutely terrified, glancing at gaping holes in Rainier’s beautiful glaciers that could swallow me whole. But I trusted my training, my guides, my team and myself. I had a mantra I recited with each step. Rock climbing had exposed me to primal fear, and I’d found ways to cope.
The fear, the risk and the suffering are all part of what makes mountaineering special. You’re pushing yourself physically and mentally beyond boundaries you thought were impossibly fixed. It’s exhilarating. Though looping the Mount Tammany hike three times on a 95º summer Pennsylvania day was monotonous and downright awful at times, it helped me prepare mentally for what was to come. A completely rained out backpacking trip in the Catskills did too. So get out there, try some things that scare you and push you mentally!

Altitude training on Quandary Peak in Colorado! (A. Campbell)
5. If You’ve Never Been at Altitude, Get There
Prior to my trip to Rainier, I’d never climbed above 6,000’. I had no idea how my body was going to react to the lack of oxygen at altitude. At 14,411’, Rainier is high enough to cause issues for climbers who have trouble coping and those who ascend too quickly. I took a short trip to Boulder, Colorado the month before the climb and hiked Quandary Peak (14,265’) to better understand how my body dealt with going from sea level to 14,000’ in two days. It wasn’t pretty, nor did it feel good, but I’m glad I was prepared going into the Rainier trip.

If you’ve got a big mountain or two under your belt, I’d love to hear more about how you prepared for it! Tell me in the comments! This post and associate comments also appears on Camp the Summit.com

Four Ways to Have Awesome Winter Weekend in the Adirondacks

The Adirondack mountains hold a special place in my heart. Aside from being beautiful and close, I've had many a great adventure there. Until the past year or two, most of my adventures in the High Peaks region had been in warm weather. But there's so much to do in the winter, and so much fun to be had! After a trip up to Keene Valley and Lake Placid this past weekend, I decided I had to do the region's cold weather possibilities justice on the blog! Here are my four favorite ways to guarantee an awesome winter weekend in the High Peaks.

Climb Some Ice!
George showing us how it's done with one tool*
This past weekend, friend and ice leader extraordinaire George took me and a group of friends out to Chapel Pond Canyon in Keene Valley. Our first stop was the Mountaineer to rent gear, including an older version of the Camp Cassin C Comp mono point crampons for me and ice tools for George - the Grivel Quantum Tech and Matrix Tech. (For the record, the tools and crampons were amazing, though I'm not convinced I'm experienced enough to pass judgment on mono vs. dual point crampons!) We parked at Chapel Pond and started the approach, which took us around the edge of the pond through knee deep snow and into the sparsely forested canyon. Our destination was Positive Reinforcement, a beautiful NEI 3+/4- flow that can, as we discovered, accommodate three parties and four ropes.

George led right up the center of the formation and set up two top ropes for us to work on throughout the day. The first climb, set up on the far right side of the flow, was the easier of the two with plenty of stemming and resting opportunities. The second, set right in the middle, took us over a more sustained vertical section. I had to feebly yell "take!" to my belayer near the top of the second climb as the predictable pump and panic set in. Some day, I'll be able to climb 90' of ice without panicking! Two other pairs of climbers came in and set up in between us. Watching one party forgo ATCs for hip belays and Munter hitch knots made for some interesting conversations.

*a note on the photo - I bet George a beer that he couldn't climb the whole pitch with one tool. I upped the ante to a six pack if he could do it without falling. He fell once. Only one beer for George!

Ski Some...Ice?

A cloudy, but beautiful day at Whiteface.
While in the vicinity of Lake Placid, it seemed silly not to visit Whiteface Mountain. With a 3,000 foot vertical and 86 trails, it's one of the best skiing destinations on the east coast. Not to mention, of course, the fact that it's dubbed the Olympic Mountain after being home to the 1980 Winter Olympic Games. Whiteface is a beautiful mountain with terrain appropriate for all levels of skiers and boarders. My favorite runs are the long, meandering Wilmington Trail and the short blue square Silver Glades. Every resort should have a blue square glade run, in my humble opinion. I love zipping through the trees, but only when I'm sure I won't crash into one!

This was my second trip to the mountain, the first being in March of last year. Conditions were less than ideal; it was a busy day and most of the runs were incredibly icy. From what I've heard, this is pretty typical of the mountain and of course, typical of east coast skiing. The runs we did were pretty well skied off and all the snow had been packed into giant randomly placed bumps. My advice: get there early on busy days or visit on a weekday if you can. But the views were just as I remember - beautiful! 

Climb a Mountain
Aleya approaching the summit of Algonquin.
The Adirondack High Peaks region is a perfect place to learn and practice winter hiking and mountaineering. Last year, Aleya and I summited Algonquin (5,114') during a three day mountaineering course with the Eastern Mountain Sports Climbing School. The hike took our group of four 6-7 hours to complete and we summitted in howling winds and sub zero temperatures. After climbing a few High Peaks in the summer, it was amazing to see what the tops of the mountains look like in winter!

While our group was out ice climbing, Cornell swimming friend Jayme was out tackling Mount Colden (4,714'). Jayme and husband CJ are well on their way to becoming 46ers - an elite group of adventurers who've climbed the 46 highest peaks in the Adirondacks. Armed with snowshoes, Jayme and her group set off from the Adirondack Loj and hiked 11.2 miles round trip to the summit and back. Jayme reports, "It was a really nice day; just the right temperature.  Not so warm that we overheated in our layers, but not so cold that we felt we had to tag the summit and make a madcap dash back down for cover from the wind in the trees. Views from the summit were minimal, but the hike up the mountain was very pretty, with so much undisturbed snow.  I would love to find a sunny winter day to go back up.  It would be stunning." Jayme and CJ chronicle their ADK 46er adventures at Paperchasers Gone Wild.

Be a Tourist in an Olympic City
Lake Placid Brewery. Yum.
Lake Placid played host to the Olympic Winter Games twice, once in 1932 and again in 1980. If you're not up for climbing mountains, skiing, or climbing ice, some of the Olympic facilities and activities in town are perfect alternatives. Visit the Bobsled and Luge Complex for a short but thrilling ride down the bobsled track. Take a tour of the Olympic Jumping Complex, including a glass enclosed elevator ride to the observation deck at the top of the K-120 jump. (The "K" refers to the distance ski jumpers aim to reach to receive the maximum number of points for distance.) Drive out of town to the High Peaks Information Center to learn more about the region. And of course, be sure to visit the Lake Placid Pub and Brewery for their famous Ubu Ale.

If you've been to the High Peaks in the winter, what are some of your favorite activities? Have you participated in any mentioned above?

Gear Review: The Red Hot Mountain Hardwear Women's Cohesion Jacket

The Cohesion Jacket and I on Rainier. (S. Lingafelter)
It's all well and good to blend in with the natural environment when you're playing outside. Muted blues, greens, browns, even black and gray are beautiful. But sometimes, a girl's got to stand out. Red is one of those eye-popping head-turning colors it's hard not to feel sexy in, even when you're soaking wet and haven't showered in three days. Red can certainly be an intimidating color to wear, but looks spectacular when it's done right.

Construction and Features
Of course, color isn't the only factor to consider in any outdoor gear purchase. The Mountain Hardwear Women's Cohesion Jacket is a solid, full featured high performance hard shell with Conduit™ DT to keep you dry and water-resistant pit zips for ventilation. Waterproof, breathable stretch panels on the elbows and back of the jacket make moving around easy and the Ergo hood fits perfectly over climbing and ski helmets. It's constructed with Ark™ 40D nylon ripstop fabric, (the "D" refers to "denier," which measures the density of textile fibers), and is super light at 13 oz. It comes in several colors, including the eye-popping Lava Red.

Overall Fit and Appearance
The length of the jacket and sleeves is perfect for me; my rear end and wrists are completely covered. I have long arms and usually have trouble with sleeve length. The Velcro cuff tabs work well to close off the sleeves and I'm glad the jacket was designed without elastic in the cuffs. I didn't notice the stretch panels on the back and sleeves until I tried ice climbing in a jacket without them. The panels make a big difference in the jacket's movement. The hood fit securely over my climbing helmet, but is on the edge of being too big. That's a hood problem I'm okay with!

The only complaints I have are the positioning of the front pockets and the overall cut. The front pockets are a bit higher than I'd like them to be; the waist belt on my climbing harness covered them completely. I don't expect to need to reach into the pockets while I'm climbing, but you never know! I'd also like to see a more figure-flattering fit. I'll take functionality over form any day, but the jacket is a bit boxy. I found it tight around the hips under all of my layers. 

The jacket and I out for a climb! (D. Herscovitch)
Performance and Recommended Use
The Cohesion and I have been through a lot over the past nine months. We've climbed Mount Rainier together, we've ice climbed together, and we've been on winter hikes together. The jacket performed beautifully in each of those situations. When the wind kicked up on Mount Rainier, I stayed warm. When it started snowing on the Appalachian Trail, I stayed comfortable. When I climbed an 80' pillar of ice, I stayed dry, and didn't get any ice chips down my sleeves!

To me, the Mountain Hardwear Cohesion jacket feels like it's constructed to be a cold weather backcountry shell. It's made to fit over layers. It's definitely breathable, but I wouldn't suggest using it as a rain jacket in warm-weather months or during activities that are likely to make you sweat profusely, i.e. running. For winter activities, it's perfect.

Where to Buy
The Cohesion is available for $82.48-165 depending on the color through Moosejaw, Backcounty.com, Altrec.com, and Mountain Hardwear.

Interview: The Life of a Professional Climbing Guide and What it Takes to Become One

JB en route to the Mountaineers Route, Mt Whitney. (A Yamaichi)
To me, mountain guides can seem immortal. They scale some of the wolds most sought after peaks over and over, day in and day out. They scale them while watching over clients, teaching them how to be safe in the mountains. They live fascinating, adventurous lives filled with incredible stories and experiences. But they're not immortal, they're real people. In this interview, we'll get a rare glimpse into the life of a professional mountain guide, and how he got what most of us consider a dream job.

James Brown, aka JB, guides big mountains for a living. He’s originally from Houston, Texas and grew up playing outside with his family. “The mountains have always been a place I've felt at home,” he says. When he started his now eight year career as a mountain guide, he though he'd go back to a “big boy” job after a summer or two. Now he spends winters teaching skiing for the Jackson Hole Mountain Resort and the rest of the year guiding for California-based SWS Mountain Guides (@swsmtns). He's also headed to Everest Base Camp in April!

The question everyone wants the answer to - how did you start guiding? (from Dave)
I like to say that I lost a bet! Just kidding; there isn’t much in my life I would change. I was just very passionate about climbing. Every spring, the mountain guide services put out notices for applications. The first company I applied to work with was RMI. They took the 30-40 best applicants and brought us out for a three day weekend tryout/interview process knowing how many slots there were. We went through interviews, hiking, soft skills tests, leadership scenarios, and demonstrated essential skills. Then they sat behind closed doors and talked about us. Peter Whittaker told me he felt like a high school basketball coach who had to cut people from the team. They post a piece of paper with names on it, and you find out if you made the cut.

It's super competitive; some folks would study things they'd done wrong after each day, and I saw people giving them bad advice on purpose. They don't just take the best climbers. They want people who are good climbers, but who are relatable and work well with clients. The year I applied, Melissa Arnot and Seth Waterfall applied too, and RMI took seven people. All seven of them are now some of the best mountain guides in the world. I was listed as the first alternate, one spot away from making it.

One of the companies I applied with passed on my resume, and out of the blue I got a phone call from David Cressman at SWS.  He offered me an assistant position, and from there I busted my butt and built a client base.  I made a lot of mistakes those first years, but after a while, I discovered I was pretty good at it. And this year, I'm in charge of hiring for SWS and the tables are turned!

JB en route to Imje Tse in the Himalaya. (M Imperial)
What mountains have you guided? Do you have a favorite?
I have 28 guided summits of Mt. Shasta and 78 of Mt. Whitney. I also guide some of the 6,000m peaks in Nepal. I don’t know what my favorite would be. In California, it would be anything in the Palisades. Smack dab in the middle of the most populous state in the country is a seemingly endless row of 14,000' peaks. You can spend a week there climbing amazing routes and not see more than one or two people. 

I also love Imje Tse (Island Peak) in Nepal. It starts out as an easy, casual route and the next thing you know you're on a super steep face that finishes on a knife edge ridge.  The summit is barely big enough for two people to stand on. Standing on your exposed little perch, you look up at Lhotse and finally start to conceptualize the magnitude that is the Himalaya.

What does a typical trip look like for you?
A typical trip for me is a two or three day intro to mountaineering climb. They're people with little experience, but who want to learn.  I'll get people up a basic route and teach them skills to get them started and get them excited to go up high in the mountains. I don’t care who you are in the mountain guiding industry; if you don’t like working with FDBs (First Day Beginners), you are in the wrong line of work.  All the best guides love to teach, and you can see it by looking at guys like Peter Whittaker, Dave Hahn, and Tim Keating.  These guys have all guided big peaks in the greater ranges but they teach beginners all the time.

JB (left) and climbing partner John Bisignano.
Is your tolerance for cold and discomfort is higher than normal, or are you just nuts?
I don’t think that my tolerance for either is better than most. In fact, I got frost bite on my right hand in the Tetons when it was -27ºF. Ever since then, that hand gets cold very easily. The key is preparation both physically and mentally.  Experience helps you understand what you can tolerate and to prepare.

Does it ever get tedious guiding the same mountain all season?
Of course there are days when it’s tedious.  I mean, everyone's had morning where they didn't want to go to work.  That said, I have the best office in the world.  I deal with new and exciting people every day, and the mountains can be an amazingly variable place.  I’ve had days where you just stroll to the summit and then two days later you get hit with a gust of wind that literally knocks you off your feet.

What's your comfort piece of gear? (from Tiffany)
Until a rock went through it, it was my backpack.  I had an old school Bora 80 that was 13 years old and had been on over 200 summits on three continents and in 8 countries with me.  I loved it! Black Diamond was kind enough to hook me up with their brand new 2011 Mission 75.  It wasn’t even released until the Outdoor Retailer show.  I’ll let you know how it works out, but it has some big shoes to fill.

JB on Matthes Crest in Tuolomne. (E. Sagalyn)
What's the one thing everyone thinks they need, or always packs too much of? (from Laurel)
Clothes.  Of course you need good outerwear and essentials, but how many socks and t-shirts do you need on a two day trip?   Inevitably, there is someone on every trip that thinks they need a clean shirt, socks and underwear every day.  If that’s a 45 day trip in the Himalaya, you'll need a Sherpa just for your base layers! I always tell people to lay out the gear they didn't use when they return from each trip and ask themselves if they really need it in the future.

JB, thank you so much for giving us a chance to see what being a mountain guide is like! Stay tuned for the next Adventure-Inspired interview with an outdoor industry pro with a super cool job coming at the beginning of March!

Gear Review: La Sportiva Women’s Nepal EVO GTX Mountaineering Boots

Ready for climbing! by Carla Cue.
With high arches and narrow heels, I’ve found La Sportiva climbing shoes fit me perfectly. When I heard they were coming out with a women’s-specific pair of mountaineering boots, I knew those were the first boots I had to try on my quest for the perfect pair.

My first look at leather boots came after a less-than-comfortable experience with plastics on an ice climbing and mountaineering trip in the Adirondacks.  I bought the La Sportiva Women’s Nepal Evo GTX boots in advance of a late summer Mount Rainier climb. I chose them over women’s models by Scarpa, Garmont and Asolo knowing the quality and fit of La Sportiva boots worked for me.

The first obstacle I ran into was finding a place to buy them in the correct size. Finding them in a size 42 was more difficult than I expected, and 42 was the largest size I’ve seen them sold in. I was concerned they were almost too small for my women’s size 10 feet.

Ricketts Glen, by Mark Trybulski
The first thing I did was to replace the insoles that came with the boots with Superfeet; the stock insoles felt much too thin.  The toe box is wide and allows plenty of space for extra socks, which came in handy on Rainier. I wore one pair of liner socks with a thick pair of mountaineering socks, and my feet stayed warm even as the temperature dropped to 10ºF. With temperatures below zero, I would consider switching to plastics; the Nepal Evo GTX boots are not made for extreme cold. Other features include insulation and a Gore-Tex waterproof breathable membrane, which keep feet warm and dry. They do not need to be treated for waterproofing out of the box. The lace locking system takes a little getting used to. The laces are locked down in the center eyelet, enough that I had to yank on the laces to get them unlocked. But it ensures they stay put and can be tightened down enough, and the removable tongue insert helps further ensures a snug, warm fit.

The boots were comfortable on the way up Mount Rainier, and I never had trouble with blisters. For mountaineering boots, they feel relatively lightweight. In addition to climbing on Rainier’s glaciers, I took them on many a training hike on the East Coast. They are full shank boots and are about as stiff soled as boots come, which means they are not made for hiking. However, on ice climbing trips, they worked like a dream. The stiff soles and toe box cushioned my feet while I kicked into the ice and my feet stayed put. They’re also designed to allow your ankles to flex despite the stiffness. I used them with both strap on and step in crampons without any trouble.

The only discomfort I had was on the descent of Mount Rainier; I had major issues with my big toes slamming into the front of the boot, enough to cause bruising. Tightening them down helped, but such stiff boots can only be tightened so much. This can be a sign that the boots are too small, but given that it had not been an issue on any hikes or ice climbing, adjusting sock layers was a good remedy.

Overall, I would definitely buy these boots again, and recommend them for mountaineering and ice climbing. They are pricey, retailing for $480, but are well worth the price. I have a feeling they will last me quite a while!

Dear Elia, I Think I Love You. (Gear Review: Petzl Elia Climbing Helmet)

I have five helmets in my gear closet to cover skiing, biking and climbing. It might seem like overkill, but like most quality equipment, each is sport specific. Each meet sets of safety standards for their intended uses and they generally aren’t interchangeable.

I consider helmets to be essential safety gear in climbing, and I had questions when I started investing in equipment almost two years ago. What sets a climbing helmet apart from my bike and ski helmets? What safety standards govern climbing helmets? What features should I look for? The first place I went to for guidance was to my outdoor community on Twitter; my peers and the companies I follow are my best source of information. Brad Werntz at Pemba Serves answered my call for help. Now, two years later and (at least a little) wiser, I got to test out a new, innovative women’s specific climbing helmet for them!

Testing the Elia at High Rocks State Park, Far Face Direct.
Prior to receiving the Petzl Elia from Pemba Serves, I’d been on the lookout for a climbing helmet that really, truly fit. I already had two to work with, the lightweight and simple Petzl Elios and the heavier, less ventilated Trango CPU, but neither was quite right. If the helmet doesn't fit, it's not going to make it on my head as often as it should. Enter the Elia, heaven’s gift to women who climb.

Petzl designed the Elia specifically for women. A reasonable buy at $65, it's a durable and lightweight foam helmet with four clips to hold a headlamp in place. But right out of the box, I could tell there was something special about it. The instructions for use show a woman with a ponytail and how to adjust the OMEGA headband to fit around it. The light blue headlamp clips and neon green padding don't scream Girl Helmet, but add enough pizzazz to make it look good. And it fits like a glove.

Headbands on standard helmets can be the bane of any long-haired climber girl's existence, and the way Petzl addressed this with the Elia is its most unique feature. The headband features a cutout that fits perfectly around my ponytail and adjusts on the sides rather than in the back. These independent lateral adjustment buttons prevent wisps of hair from getting snagged and also provide a better overall fit. The helmet felt just as secure with my hair down. (Read: the Elia can work for guys, too!)

The Elia on belay at High Rocks State Park.
Ponytail problems aside, I’ve forgone helmets in the past because an ill fitting one will slide all over the place. The last thing I want while I'm heaving myself up a burly overhanging route is to simultaneously have to survive an attempted choking. But the Elia just stayed put, comfortably. I almost forgot it was there. The removable padding absorbed sweat on my forehead, which I need desperately climbing in East Coast humidity, and provided the perfect cushioning for my noggin.

In trying to be a diligent reviewer, I thought hard about any feature missing or anything I didn’t like. The only initial concern I had was that the shape of the back of the helmet would compromise safety. In comparing it side by side to the Elios, I saw that the cutout in the shell of the Elia itself is minimal; the real difference is in the headband, which isn’t what truly protects the head from the impact of a falling object. Its function is to keep the helmet secure on my head. The Elia is CE (European Committee for Standardization) EN 12492 and UIAA (Union Internationale des Associations d'Alpinisme) certified, which put my concerns to rest.

I have yet to take it out for ice climbing or mountaineering, but all the preliminary over-the-winter-hat testing I've done at home makes me think my opinion won't change. My theory is the Elia will be even better on ice than the Elios; the arrangement of ventilation holes might further block falling debris. Odds are the rest of my helmet collection will sit gathering dust in the gear closet while the Elia and I go out and play.

Covetable Cold Weather Gear

Covet \’kə-vət\: to wish for earnestly ; to desire inordinately or culpably.
I know it's mid-September. It's not even officially autumn yet. The first snowflake won't fall where I am for another three or four months, if one falls at all this winter. But I've already got a growing list of toys I'm coveting. I blame the existence of this list on Petzl; their release of the newest, coolest ice tools for the upcoming season got me going, and then I couldn't stop! This list encompasses things that (a) exceed my budget, (b) I would use in activities I've still got a lot to learn about, or (c) are just darn good looking.

Photo from Petzl.com
Petzl QUARK Ice Axe
I've ice climbed twice. Three times if you count the total number of days independently of the number of trips. But I absolutely love it, and have a few friends to do it with this winter! Lucky for me, I had the opportunity to test out three different types of ice tools and the Petzl QUARKs were my favorite. Between the weight (it's the lightest of Petzl's ice climbing tools), the handle (not a huge fan of the Black Diamond Fusion handle), and all of the interchangeable parts, it's a great piece of gear to covet. This year's model looks even better. According to Petzl's website, there are a couple of new and improved features on the QUARK this year. First, the modular head. The QUARK is designed to be both a technical ice took and mountaineering axe, and the modular head makes for super easy adjustments. Second, the modular handle, which allows for a many different grip combinations. I've climbed with leashes and without, and this grip looks perfect for leashless climbing.

Photo from LaSportiva.com
La Sportiva Olympus Mon EVO Boots Now, I'm going to be honest. I covet these not because I'm an experienced high-altitude mountaineer, because they're $900, or because I have habits of being in places where it's mind-numbingly cold. I covet these because I dream about getting myself into a situation where I'd need them! These, for me, are like the golden chalice of cold weather sports. To progress far enough in mountaineering where these would be necessary is something I'm pretty sure I'd love to do someday. Of course, on Everest, it doesn't have to be winter for these to come in quite handy.They're incredibly light weight considering their size, and kevlar on the calves means gaiters aren't necessary. The inner lacing system, according to reviews on Moosejaw, lets you leave your climbing partners in the dust getting ready in the morning. And if Melissa Arnot uses them on Everest, they've got to be pretty great. She knows her stuff! Now all La Sportiva needs is a women's specific model...

Camp Muir on Rainier. Photo by Tiffany Royal.
Mountain Hardwear Trango 3.1 Now if I'm going to covet hardcore mountaineering boots, I might as well pick a tent to go with them! The Trango tents have been long-standing favorites for mountaineers and I can certainly see why. I had the opportunity to sleep in one at Camp Muir on Rainier and found that, despite my past experience with 3-person tents barely fitting three people comfortably, the Trango 3.1 did. Tiffany, Sara and I did have to take turns spreading out all of our gear to pack for our summit bid, but that was the only time the tent felt cramped. I could kneel comfortably in it, and the vestibule provided plenty of room to store three packs and three pairs of boots. Mesh storage pockets run the length of both tent walls. Despite strong winds, the tent felt bomb proof, secure and warm, (which was thanks to our wonderful RMI guides who set it up for us).

Photo from Eddiebauer.com

First Ascent Downlight Sweater
I'm the proud owner of the First Ascent Peak XV Down Jacket and absolutely love it. It just fits, all of it. The hood stays where it's supposed to and everything's the right length. But winters around these parts aren't cold enough to warrant an 850 fill down parka, and I'd love to have something not quite as warm to wear around town, or as an insulating layer in place of fleece. I tried the Downlight Sweater on at Whittaker Mountaineering's gear shop and loved it. The best part - it comes in petite and tall sizes for those of us who don't meet standard specifications. The sleeves were almost too short for my arms in the standard sizes, but the torso fit perfectly. I never imagined a down jacket could be flattering! And the beautiful cyan blue one pictured to the left is particularly covet-worthy.

Photo from Piperlime.com
Merrell Spire Peak Waterproof Boots Merrell makes some of the best shoes and boots, casual and functional, I've ever worn. For hiking shoes, they're my go to company. When I moved to Alaska in 2006, I bought a pair of ankle boots similar to the Tetra Catch for walking around in Anchorage during the winter. They were the most comfortable, stylish winter boots I'd ever worn, and I finally retired them after I'd worn them to death and they fell apart three years later. They seem to have a nack for producing casual shoes that look good, feel good, and strike the perfect balance between the effort-free outdoorswoman and the girl in me who cares about looking cute. Every girl needs a good pair of tall boots, but not every girl needs to worry about whether or not she'll actually be able to walk in them. They even stretch a little to accommodate athletic calves. And they'll last for more than one winter!

What's on your wish list this winter? Anything good I left out?

Mt. Rainier Trip Report - Part 2

Day 3 - Hike from Paradise (5,400') to Camp Muir (10,080')
Heading to Camp Muir, 8/20,10.

The excitement at Mesdag Basecamp, where I had the immense good fortune of staying with Tiffany, Sara and Candace in Ashford, was palatable that morning. We'd unpacked, analyzed, giggled and repacked practically all night. We were ready. Guide Melissa broke the day into hour long segments with a short break for food and sunscreen reapplication at the end of each. Our goal was to get up there having conserved as much energy as possible for the summit bid.


At a pace that allowed us to gain 1,000' per hour, give or take, it took us just shy of six hours. The pace was very comfortable, not quite easy, but comfortable. At each break, we'd fuel up, drink water, find as much privacy as possible in the giant snowfield to do our "business," and move on. I'll never be shy about peeing in the woods again, that's for sure!

NPS Ranger Station at Camp Muir.
Camp Muir came into view after our last break, and it was as perfect as I expected. The camp consisted of several Himalayan-esque huts perched on a rocky ridge surrounded by snow. Prayer flags tied to the NPS Ranger Station fluttered in the wind. Us girls opted to give another RMI climb ascending at the same time* the RMI hut while we split into three Mountain Hardwear expedition tents for a "true alpine experience" devoid of snoring. Tiffany, Sara and I took turns sorting summit day gear in our tent, devouring freeze dried meals, and sharing our excitement with our teammates.

We finally turned in for the "night" around 7pm for our "nap." I fell in and out of sleep, discovering the 20º bag I'd brought wasn't quite warm enough. The forecast called for 5-10º at the summit with 30-40mph winds, and a slightly warmer 20-25º at Camp Muir. But it looked like a perfect day to climb a mountain. 

The Upper Mountain.
Day 4 - Summit Day and Descent via the Disappointment Cleaver Route

Melissa came by with a cheerful, "Good Morning, Ladies!" just after midnight. I was relieved to be getting up; the non-sleep and excitement were making me nuts! She'd given us rope team assignments the night before, and I was looking forward to climbing with Solveig and Tiffany. We left Camp Muir just after 1:30am. My favorite part of the nighttime climbing was watching all of the tiny headlamp lights winding their way up the route ahead of us.

The first leg took just over an hour, winding across the Cowlitz Glacier to Cathedral Gap, then on to the Igraham Flats. The ascent was minimal and gave us a great chance to warm up. Melissa warned us to keep our ears open for the sounds of rock and ice fall, which we'd heard a few times during the night. It's enough to make sure you're acutely aware of your surroundings, that's for sure.

The second leg, which took us across the Ingraham Flats, to the base of the Disappointment Cleaver, then to the top of it, would be the longest and the most challenging. The hour and a half took us up a section of mixed climbing - hand over hand crawling and high stepping up boulders, scree slopes, snow, and everything in between, all with crampons on in the dark. It was all I could do to keep my heart from jumping out of my chest. At this point, I realized what a big deal this climb really was; Solveig and Melissa told us to stay on our feet with good reason. Part of me was grateful the night shrouded the route.

Break time in the summit crater!
By the time we reached the top of the Cleaver at 12,300', I was both physically and emotionally ready for a break. But to spend an hour and a half being so scared and persevering was the best feeling in the world. I felt exhilarated and re-energized. As the guides worked with us to assess ourselves, I realized for the first time that I was going to make it. On the next section, we had mostly steep snow to deal with, and the sun began to rise. I could see each separate layer of clouds in the distance and lightening over Mt. Hood miles and miles away. My focus remained on the trail, the rope in front of me, and my breathing. Glances at the great deep blue crevasses in the Emmons Glacier running parallel to our trail sent bursts of adrenaline from head to toe.

Our last break before the summit was short. The wind had picked up and I could see clouds blowing past the summit above us. Our guides made sure we focused every inch of our being on climbing, and I could see a small rock band above us - the crater rim. Before we could reach it, we crossed a small aluminum ladder spread across a crevasse with a hand line. We continued up, and before I knew it, we'd climbed to the rock band, over it, and began dropping down into the crater. We picked a flat spot, dropped our packs, and I sat down, letting a few tears out, and wondered in happy disbelief how I'd managed to get there.

By the time we were ready to descend, the wind had picked up and gray clouds had started forming above us. Melissa discussed again the importance of descending "in good style," and how the climb was only half over. It took us six hours to ascend from Camp Muir and three hours to get back. (I blame that stretch of the climb for the soreness in my quads the next day!) After an hour at Camp Muir and a migraine pill, we descended the rest of the way to Paradise. I learned I'm not as adept at boot-skiing as I thought, and glissading is more fun if you've got waterproof pants on. But by 3:30pm, we were safe at Paradise, and on our way down to RMI Basecamp for celebrations.
Our team of mountaineeresses! From left, standing: Alicia, Hillary, guide Carrie, guide Melissa, Kruti, Amy, guide Solveig, Sara, Tiffany, Me. Photo courtesy of Tiffany Royal.

You don't conquer mountains. You respect them, learn as best you can how to climb them safely, and sometimes, you're lucky enough to reach the summit and return home in one piece a changed person. I am a changed person because of this experience. The physical challenge of climbing the mountain, the mental battles each of us fought, the way we worked together as a team, and the cause we worked toward have given me a renewed sense of what we're all capable of if we care enough. And I can't wait for the next adventure!

*As it turns out, some members of this co-ed climb led by Gabi were ascending Mount Rainier on behalf of the Seven Ribbons Foundation. Congratulations, and good luck to them with their Seven Summits endeavor!

Mt. Rainier Trip Report - Part 1

The crunch of snow under my crampons. The blasts of wind. Glancing up at the knot dangling from my harness to make sure I maintained proper rope interval. Humming 'The Drumming Song' by Florence and the Machine. One foot in front of the other. Rest step with attitude. Use your knees as hinges. Big pressure breath. Ice axe in the uphill hand planted in the slope for balance. Listen for rock fall. Ignore the sound my crampons make on rock. Repeat who I'm climbing for - "Candace, Kids, Supporters at Home, Myself." Chomp down on frozen Snickers bar and remember to put summit food in my pocket so it doesn't freeze.Watch the sun rise over Mount Adams and realize, again, how small I am. Look around at Tiffany, Sara, Hillary, Alicia, Amy, Solveig and Melissa and feel like I deserve to be here. I belong. I am strong enough, and I'm going to make it.  
- excerpt from my journal, 8/ 23/10

Our team after climbing school on day 2. From left, standing:
Alicia, Hillary, Sara, Me, Kruti, Amy, Tiffany. Photo courtesy of Tiffany Royal.

I can't believe it happened. But I know it did. I just took out the certificate of achievement my rope team leader and mountaineeress extraordinaire Solveig handed me while we chowed down on recovery pizza at RMI Basecamp in Ashford. She told me she knew I'd overcome a lot of anxieties on the trip, and she was right. Seven months of preparation, encouraging words from friends and family, $5,153 raised for Big City Mountaineers for four days of learning and climbing, and life changing experiences. In total, the Mount Rainier Women's Climb participants raised over $38,000 for BCM.

It's been just over a week, and I'm still learning from it all. The days after, I'd feel as though I needed to cry on several occasions, whether out of pure relief we accomplished our goal safely, out of sorrow because it was over, or another reason entirely. It was one of the most physically and mentally demanding things I've ever done. My whole body ached by the end. I spend a good portion of our upper mountain ascent feeling like I do when I lead climb - mildly in control and absolutely terrified. But every time I glanced forward to the lifeline tying me to Tiffany, or to the side at the expanse of snow, ice, and rock below us, I couldn't help but think, "I am the luckiest girl in the world."

It was at our second break atop the Disappointment Cleaver at 12,300' in the dark on Saturday morning, August 21st, that I realized I was going to make it. I felt tired, but strong and capable. I had no appetite, and despite both that and being half asleep, I knew Mount Rainier was going to allow me to climb her that morning.

Day 1 - Gear Check and Meeting the Team, 8/18/10
Our journey as a team began three days prior when we all met in Ashford, WA at RMI Basecamp for our gear check. It was a chance for us to get to know each other and ask any last minute questions. I had a little celebrity shocker moment when I met our lead guide, venerable mountaineering powerhouse and First Ascent sponsored athlete Melissa Arnot. Assistant guides Solveig and Carrie, equally talented and impressive, would join us over the course of the next day or two. We couldn't have asked for a stronger, more cohesive group of ladies. Each brought their own strengths, their own climbing history, their own personalities, and each made a significant contribution. We bonded over Nepalese food, joking about how much more fun we'd have than the guys' teams.

Suiting up at climbing school!
Day 2 - Climbing School, 8/19/10
We woke early Thursday morning to a cloud covered sky, and took a shuttle up to the Paradise Visitors Center. Melissa made sure to point out our shuttle carefully, lest we jump in the one full of climbers planning to hike to Camp Muir that day by mistake! With light packs, we easily made our way up to a snow-covered slope. We spend the morning learning how to use the rest step to conserve energy, how to pressure breathe and how to kick steps, making sure each step was better for the person behind us. The word of the day was "efficiency."

The afternoon's lessons included self arresting, traveling in rope teams, rope management, proper rope interval, good communication, and lots of giggling. It was the best day of mountaineering instruction I've ever had. Solveig and Melissa did an amazing job of explaining and demonstrating skills in a way we could all understand. After discussions of layering systems, food rationing, and what to expect en route to Camp Muir the next day, we hiked back down to Paradise. I managed a giant bowl of fettuccine alfredo at the Copper Creek Inn for dinner despite the butterflies in my stomach. After seven months of preparation, we were ready to climb.

...to be continued

Don't Feed Wildlife! (Even if it's Little.)

Ar Arctic Ground Squirrel poses in Denali.
I came across this article on twitter last night via @parkstraveler about the euthanization of yet another bear in Yellowstone National Park. She'd learned to associate the presence of people with the availability of food, and had become aggressive in her attempts to get it from them. This included venturing into a backcountry campsite and forcing a backpacker to give up his dinner. Five bears have been killed in Yellowstone this year, and the other most recent killing was through euthanization in June. It's depressing.


Those of us who enjoy the outdoors and wild places have a responsibility to protect them, and to leave them as we found them. This doesn't just mean avoiding tromping all over vegetation by venturing off established trails. It doesn't just mean disposing of the plastic water bottles or granola bar wrappers you use properly. It means having an inherent sense of respect for the outdoors, its inhabitants, and for others who revel in its beauty.

One of the best ways to see Denali National Park in the summer if you're short on time is through the Visitor Transportation System. There's one 92-mile road into Denali, only 15 miles of it are paved, and non-commercial vehicles are only allowed on the paved portion. The shuttle and tour busses, aside from human power, are your only option for park road travel. Tour bus drivers are certified driver-naturalists who can provide in-depth information about the park, its history, and its inhabitants.

With two full summers living in Denali, I had plenty of time to explore, but will never forget my first bus trip into the park. I was on a green shuttle bus bound for my first real Denali hike with new friend Emily. As the bus lurched forward and pulled on to the park road, one of the first things our driver made sure we knew was the importance of respecting wildlife. He told us he'd be glad to help us spot moose, bears, dall sheep, anything we could find, as long as we promised to be quiet, and to keep arms and cameras inside the bus. The wildlife, he told us, needed to be protected, and the best way to do that was to make sure our presence didn't affect them in any way. I was astounded that even an excited shout to other bus passengers could affect an animal.

Dall Sheep on the park road in autumn
One of the seven Leave No Trace principles is to respect wildlife. The article doesn't make it clear as to how the bear might have become so used to getting human food, but it's pretty unlikely visitors were hand-feeding her. Proper backcountry food storage and waste disposal are vital. Parks like Denali require all backcountry campers to carry food and other items that animals might mistake as food (toothpaste, deodorant, cough drops) in bear-resistant canisters. Campgrounds in Denali have bear-proof lockers and sheds for campers to store items in. It's as much for our own safety as it is for the animals.

We have to remember that we're visitors to their home, and approaching them for a better photo or a closer look can be incredibly stressful to them. If we're able to enjoy the outdoors without affecting its inhabitants, we'll all be much better off, and euthanized bear stories may be fewer and further between. The Leave No Trace website has some great resources on education and ways to minimize your impact on the outdoors, check 'em out!

"Excuses, Excuses!" and Turning 'em Around

Amy did it again. She wrote about something I've been ignoring and made me think. She called me out, saying everyone has excuses they use for not working out. And she's right, I sure do. After taking a good, hard look in the proverbial mirror, I've got a whopping list of them. But most importantly, Amy's got this crazy idea that having excuses, knowing them and knowing how to deal with them, can actually help us all get motivated. As it turns out, she's right.

So, here are my excuses, out for the world to see. To help me understand where they come from, I've organized them into categories and began trying to figure out what I've done to get rid of them, and what I still need to work on.

Getting up and getting out is fun, see??
My Excuses
  1. I'm really tired from (a) being at work all day (b) staying up too late (c) yesterday's workout(s).
  2. I can't imagine any activity that will actually keep my attention for more than 10 minutes.
  3. I don't want to go by myself.
  4. I don't want to go with other people.
  5. It's going to be really hard and painful.
  6. One day really doesn't make that big of a difference.
  7. It's way too hot/cold/rainy/sunny outside and I'm going to be uncomfortable.
  8. I ate too much and need to digest before I do anything.
  9. I need to eat first, I don't have any energy.
  10. I'm going to feel like I shouldn't be as tired as I am/breathing as hard as I am during the workout.
  11. People will judge me based on how hard it looks like I'm working and they'll think I'm out of shape.
  12. I won't be as good or as strong as everyone else or as strong as I think I should be.
  13. I just don't feel like it.
  14. I deserve a break/rest day.
  15. I need to stop letting workouts take priority over my social life. My friends think I'm insane.
Worrying about what other people think - 4, 10, 11, 12, 15
To some degree, we all care about what other people think, and it's easy to get wrapped up in worrying about how we're perceived. I worry about looking out of shape because I think I'm supposed to be in shape. I worry about how I'll be judged if I'm huffing and puffing up a trail, even if I'm carrying 40 pounds of training weight. I worry I'll lose all of my social opportunities if I keep saying no to booze in favor of sweating for an hour in spin class.

But the reality is, I doubt everyone at the gym is looking at me and deciding whether I'm in shape or not. I doubt people notice whether I'm huffing or puffing up the trails, and even if they do, who cares? And won't I huff and puff less in the future if I train more? I've discovered if I surround myself with people who are passionate about their goals (these amazing ladies), it's easy to stop worrying about everyone else!

Wearing the lazypants
- 1, 2, 5, 6, 7, 8, 9, 13
The lazypants. I imagine them as a pair of old, torn, stained sweats. Maybe faded, ripped up, too-short jeans with a hole in the crotch. They're pants you put on when you're out of clean clothes, or when you don't expect to meet another living thing in the world.

The excuses that fall into this category show nothing more than a lack of motivation. If I'm motivated, I'll plan my day, including food, around what will help me get my workouts done. I'm really talented at talking myself out of things, and am working on learning to talk myself into things. I think, "it won't be that bad, and you'll feel SO much better if you just get up and go! It'll make the next session feel easier." And I'm usually right.

Glaring manifestations of fear - all of them, but especially 3, 4, 5, 13
Fear exists in the future and only applies to things that haven't happened yet. So what's the big deal? Fear might be based on past experience, but can also be based on nonsensical visions of what might happen. My list of excuses shows me I'm afraid of a lot, and some of my fears are entirely ungrounded and meaningless. They're also self-defeating; how is being afraid of pain at the gym going to prepare me for something like Rainier?

To cope with my fear of what people think, working out alone or in nonthreatening, familiar environments makes a huge difference. Being alone also gives me time to pay attention to my thoughts and redirect them if necessary. To cope with my fear of pain, I don't give myself time to think about it. To cope with feelings of inadequacy, I remind myself of the things I've accomplished and how hard I worked to get there. I remind myself that it's possible, and to cut myself a break.

Could actually be legit - 1, 14
...and then there are excuses that might actually be real reasons to take a day off. A huge part of training is building in rest and recovery periods. It's about listening to your body. It's about discerning between your muscles telling you they need a break and the lazy talk, or the fear. And those voices will sound different to everyone. I've found learning to know myself, my limits and how they evolve is essential. But if I'm thinking about allowing myself a rest day because I stayed up too late, well, that falls into the Lazypants category.

And as with any decision, I've got to accept the consequences.


* * * * * *

Amy, thank you for continuing to find ways to help me learn about myself! Check her out at http://www.expandoutdoors.com/

Valentine's Day Ice Climbing

I'd venture to guess most of you who read my blog don't believe in a typical Valentine's Day celebration, or at least find creative ways to express love. Don't get me wrong, I adore flowers and being doted on and celebrating and dinners out! But I can't think of a better way to spend a Hallmark holiday rooted in the celebration of love than playing outside.


Sunday was a beautiful day in northern Pennsylvania, and a perfect day for what might have been my favorite TerraMar Adventures event to organize of all time: a mountaineering and ice climbing skills day! I started working with Brett Simpson, Associate Director of the Quest program at Bloomsburg University, a month before the event. Of course, with a sport like ice climbing that's so dependent on weather, we did our best to plan and crossed our fingers, hoping the ice would stick around long enough. Working with Brett was an event organizer's dream come true - everything was as smooth as butter on my end!

After several days of 40º F temperatures at the end of January, I was a little concerned about the conditions. But then Mother Nature walloped us with two feet of snow, it got considerably colder, and all was right with the world!

We met at Ricketts Glen State Park and spent an hour getting geared up. We hiked an hour in through snow covered trails and around beautiful waterfalls. The park is know for its 22 named waterfalls, one of which is 94 feet tall. Perfect for ice climbing! 

We split into two groups during the hike in. The first group, led by Brett, was comprised of more experienced climbers, i.e. those of us who'd used crampons before. We got right down into the gorge and on the ice. The second group, let by Jeremy, spent a little more time learning how to walk with crampons and move with an ice axe.

Brett and his team from Quest (Jeremy, Lee, and Tabitha) had set up four topropes for our group of 16 people. We had the gorge to ourselves all day, which surprised me. I couldn't wait to get started and jumped right on a 30-40' NEI 4. The Quest team had set up ropes on three other climbs as well, and I'd guess the rest were NEI 2-3. The ice was perfect, just soft enough, and I managed to make it up the NEI 4 climb with a few falls, mostly a result of poor technique. Two other TerraMar members, both first time ice climbers, made it up that route by the end of the day. We were all whooping and hollering when Carla, a brand new ice climber and triathlete extraordinaire, made it to the top on our last climb of the day.

RE: bad technique - I have a tendency to stand up on my toes when I have a solid grip on the ice with my crampons. Lifting your heels or moving your feet too much at all once you've placed them wiggles the crampon points around in the ice, causing them to slip out. It's an unpleasant surprise if you're in the middle of placing your ice tools!


We all rotated through the four climbs, getting in two or three climbs on average. Other things we were able to cover included:

  • belaying - a good number of people had never belayed before
  • ice screw placements
  • ice anchor building
  • movement with an ice axe
  • characteristics of ice that is safe to climb
I was incredibly impressed with how well everyone did through the course of the day, considering many had never seen an ice tool before! Making it up an ice climb for the first time is an incredible feat, much less those who were able to climb the NEI 4 on their first day. It was a great learning experience and a whole lot of fun!

A big thanks to Brett, Jeremy, Lee and Tabitha for taking such good care of us, and for helping us all have a unique and incredible Valentine's Day on the ice! Check out the Quest program, too, they have a couple of really amazing international trips coming up, including Portero Chico rock climbing! And thanks to Cory and John for the photos!